In a Microsoft Dynamics 365 Business Central Account Schedule, you can design a Column Layout where each column covers a different period.
This web page and also the video show you how you can view the Date Filter in the columns of an Account Schedule.
Take a look at Column Layout PERIODS in Cronus USA, Inc.:
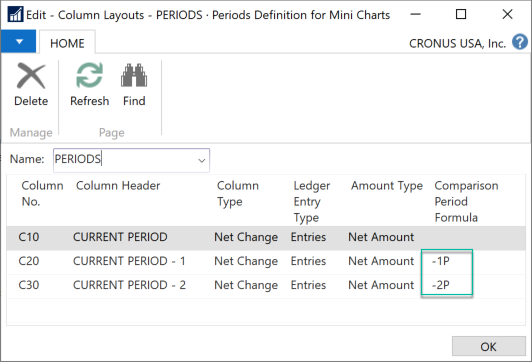
Column C20 shows the Comparison Period Formula -1P. In Cronus USA, Inc., the Accounting Period is defined as one Month.
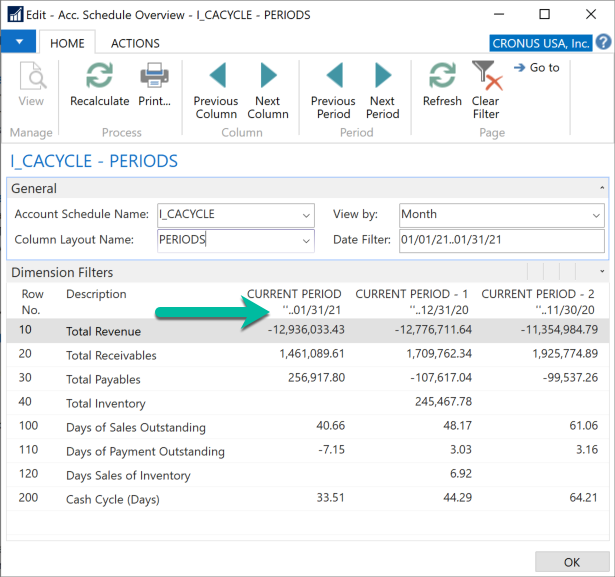
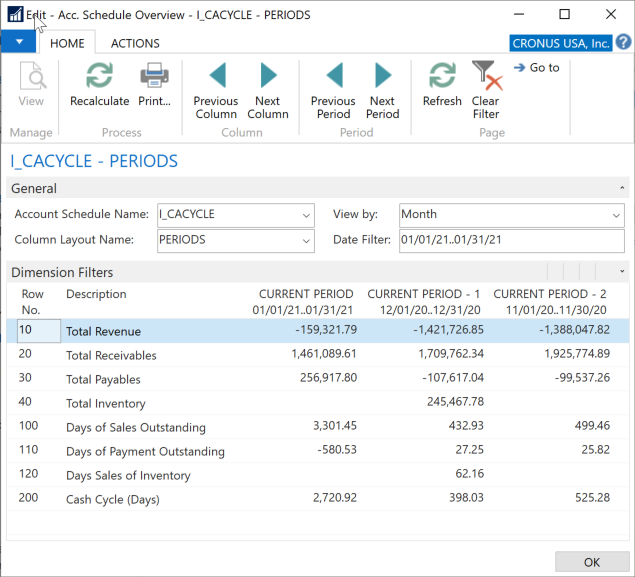
When you run Account Schedule I_CACYCLE, Column Layout PERIODS generates three columns:
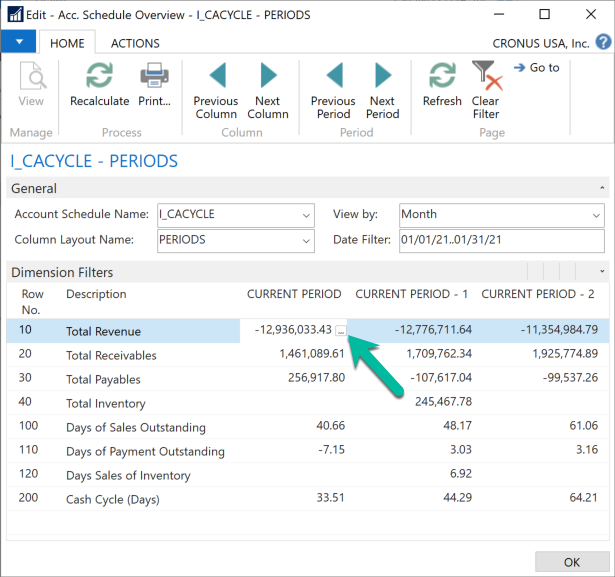
The first column CURRENT PERIOD filters on the Date Filter you set in the header, in our example, January 2021.
The second column CURRENT PERIOD -1 filters on one Month prior to the Date Filter, December 2020.
The third column CURRENT PERIOD -2 filters on two Months prior to the Date Filter, November 2020.
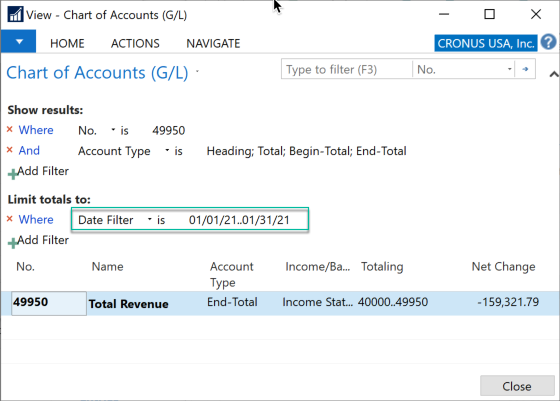
How can you be sure which column filters on which period? Drill down into Row NO. 10 Total Revenue and column CURRENT PERIOD. The Chart of Account window opens to G/L Account No. 49950 Total Revenue:
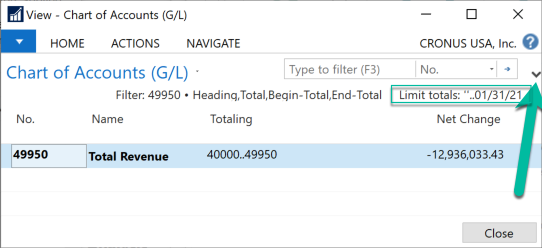
In the upper right corner you can see the Date Filter presented as:
Limit totals: ”..o1/31/21
Click on the small black drilldown arrow in the top right of your Chart of Accounts window. The filters section extends:

You can now clearly see the filters the system applied to calculate January 2021 balance on G/L Account 49950 Total Revenue. (Note: reporting on the balance of an income statement account is only accurate after you posted all income statement accounts to retained earnings).
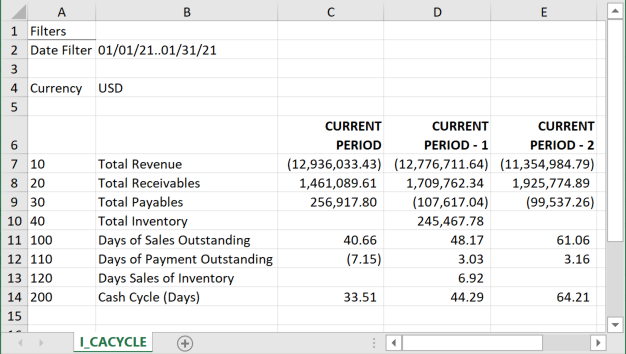
A financial report reader may be left with a little uncertainty, not being able to see the Date Filter in the columns. Especially when you export the report to Excel and hand it to another person, that person may not be familiar with the filtering mechanism, and they cannot drill down into the source data.
For this reason I wrote a small modification to Microsoft Business Central 365, adding the Date Filter to the Account Schedule column header:
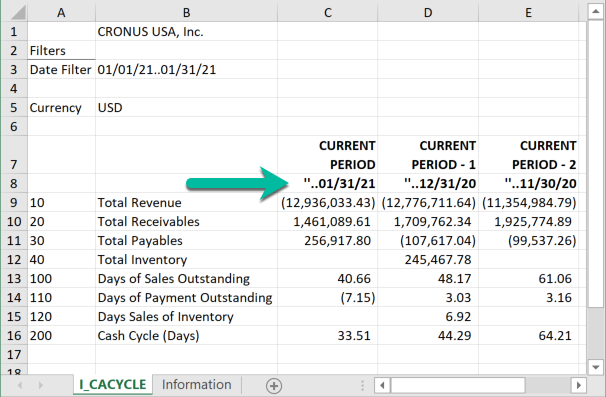
When you export the Account Schedule to Excel, the Date Filter also shows in the column headings:
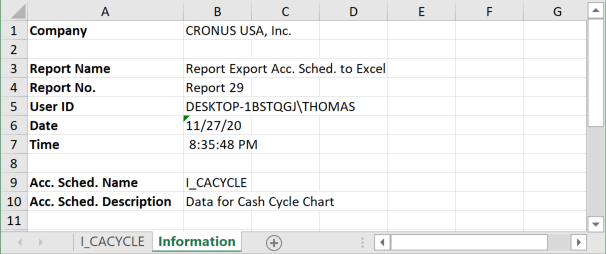
Financial report readers often feel more comfortable about the validity of the data they are looking at if they have some indication of the data’s origin. As a bonus, I added an Information tab to the Excel file, indicating who ran the report when and with which filter settings:
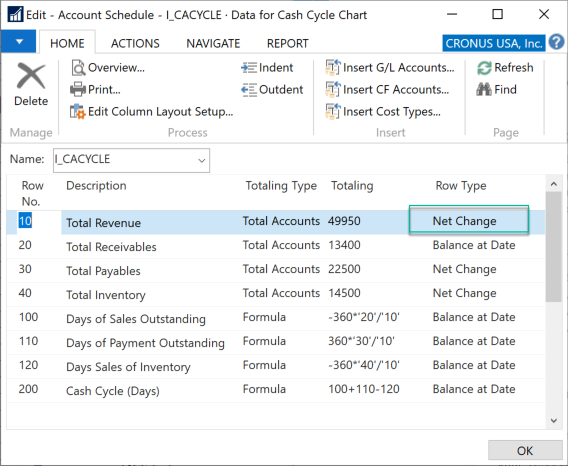
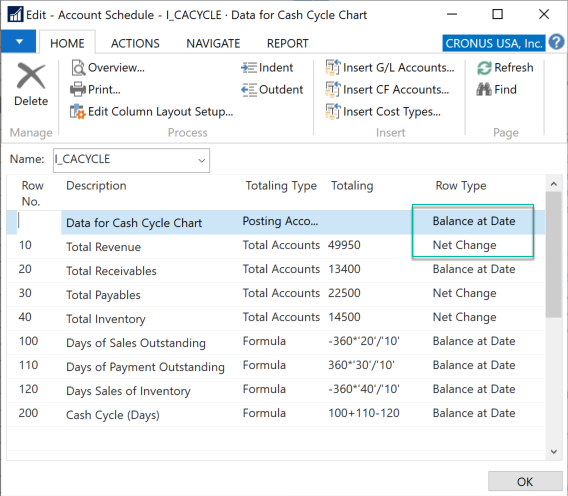
This is the place for a word of caution, and it is probably the reason why Microsoft does not give you the Date Filter in the Account Schedule Column header. The different rows in an Account Schedule can have different Row Types. The modification I wrote reads the Row Type in the first Row of the Account Schedule. Let’s say you are not comfortable with the Row Type Balance At Date for Row 10 Total Revenue, because you want the report to be accurate, regardless of whether or not you already posted the Income Statement accounts to Retained Earnings. You change the Row Type to Net Change:
When you now run the Account Schedule, the Date Filter in the column heading indicates a date range rather than an end date:
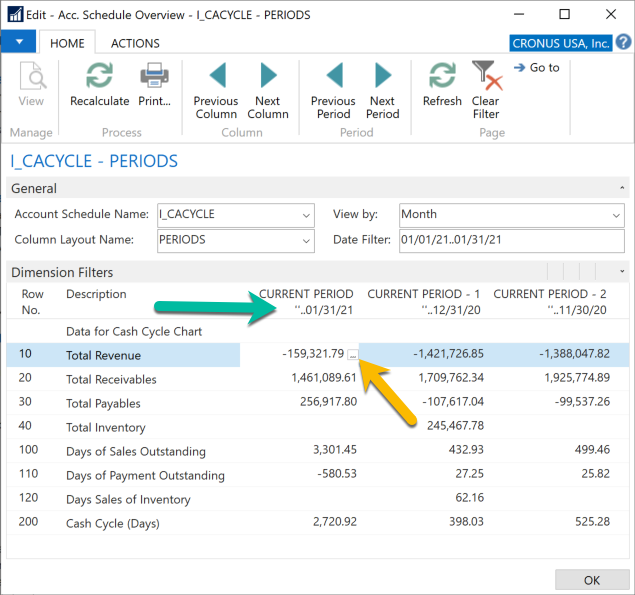
To display the Date Filter in the format you desire, you can add a heading row to the Account Schedule. This heading row does not report any amounts, but simply serves to hold the Row Type Balance at Date:
The column heading now shows the desired end date filter (green arrow):
The drilldown into Row No. 10 Total Revenue confirms the date range filter applied:
Download this page as pdf document:
Published: 03-Dec-2020